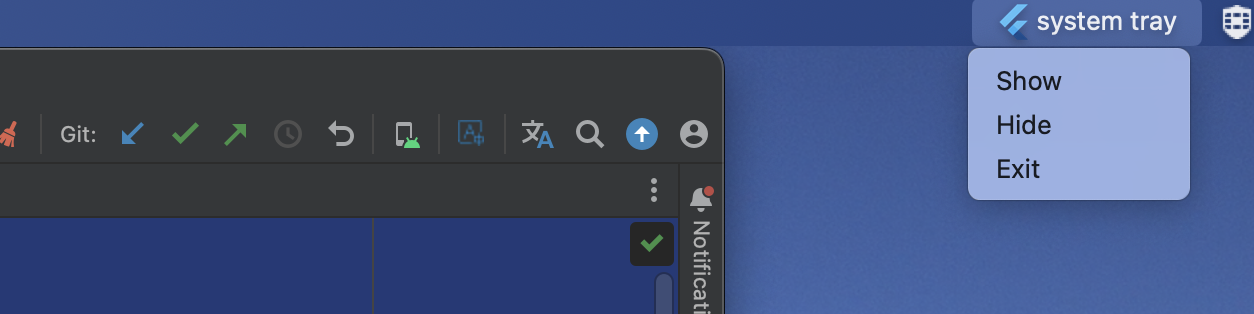
系统托盘(Tray)
系统托盘就是状态栏里面对应的图标点击菜单
主要有两款框架
| 框架 | 一句话评价 |
|---|---|
| tray_manager | 轻量、简单、易用,适合常规托盘功能 |
| system_tray | 更底层、更强大、支持图标/菜单/消息弹窗等更多功能,但复杂度更高 |
🧱 基础能力对比
| 能力 | tray_manager ✅ | system_tray ✅ |
|---|---|---|
| 添加系统托盘图标 | ✅ | ✅ |
| 托盘菜单支持 | ✅(基本菜单) | ✅(更丰富,支持子菜单、图标) |
| 点击托盘事件监听 | ✅(click, right click 等) | ✅(支持更多系统原生事件) |
| 更改托盘图标 | ✅ | ✅ |
| 弹出系统原生消息(Balloon) | ❌ | ✅(仅 Windows 支持) |
| 子菜单图标/多级菜单 | ❌ | ✅ |
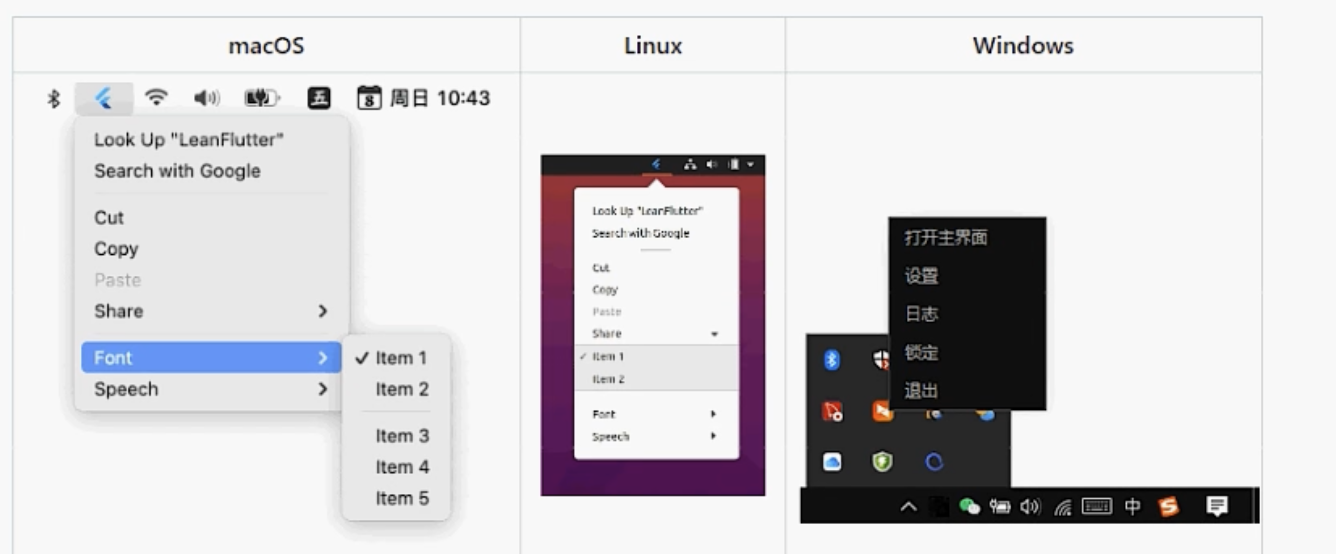
| 多平台支持(Win/macOS/Linux) | ✅(全支持) | ✅(全支持) |
| 桌面通知 | ❌ | ✅(Windows balloon) |
| 设置 Tooltip | ✅ | ✅ |
⚙️ 技术架构对比
| 属性 | tray_manager | system_tray |
|---|---|---|
| 底层语言 | 通过 Dart FFI 调用 C++/Objective-C | 更底层,直接使用 C/C++ 实现系统调用 |
| 依赖框架 | flutter, ffi | flutter, ffi, tray_system(C库) |
| 项目大小 | 小、纯 Flutter | 稍大,构建依赖更复杂 |
| 接入简单性 | 更简单,API 清晰 | 功能强大但 API 比较底层,写法偏原生 |
🔧 示例代码对比
(添加托盘图标 + 菜单)
tray_manager 简洁示例:
await trayManager.setIcon('assets/tray_icon.png');
await trayManager.setContextMenu(Menu(items: [MenuItem(key: 'show', label: 'Show Window'),MenuItem.separator(),MenuItem(key: 'exit', label: 'Exit'),
]));trayManager.addListener(MyTrayListener());
system_tray 强大示例:
final SystemTray tray = SystemTray();
await tray.initSystemTray(iconPath: 'assets/tray_icon.png',toolTip: 'My Tray App',
);final Menu menu = Menu();
await menu.buildFrom([MenuItemLabel(label: 'Show Window'),MenuSeparator(),MenuItemLabel(label: 'Exit'),
]);await tray.setContextMenu(menu);
tray.registerSystemTrayEventHandler((eventName) {print("Tray event: $eventName");
});
✅ 推荐场景(选型建议)
| 你的需求 | 推荐插件 | 理由 |
|---|---|---|
| 只要托盘图标 + 简单菜单 | tray_manager | 简单好用,集成快 |
| 要显示系统消息、子菜单、图标菜单 | system_tray | 功能强大,系统级集成更全面 |
| 要更复杂的原生交互(例如原生通知) | system_tray | 支持 Windows Balloon/原生消息 |
| 想快速开发 MVP,功能不复杂 | tray_manager | 更容易快速上线 |
| 在意插件活跃度 / 维护频率 | system_tray | JetBrains 社区更认可(大佬多) |
hello word
import 'dart:io';import 'package:flutter/material.dart';
import 'package:system_tray/system_tray.dart';void main() {runApp(const MyApp());initSystemTray();
}Future<void> initSystemTray() async {String path =Platform.isWindows ? 'assets/app_icon.ico' : 'assets/app_icon.png';final AppWindow appWindow = AppWindow();final SystemTray systemTray = SystemTray();// We first init the systray menuawait systemTray.initSystemTray(title: "system tray",iconPath: path,);// create context menufinal Menu menu = Menu();await menu.buildFrom([MenuItemLabel(label: 'Show', onClicked: (menuItem) => appWindow.show()),MenuItemLabel(label: 'Hide', onClicked: (menuItem) => appWindow.hide()),MenuItemLabel(label: 'Exit', onClicked: (menuItem) => appWindow.close()),]);// set context menuawait systemTray.setContextMenu(menu);// handle system tray eventsystemTray.registerSystemTrayEventHandler((eventName) {debugPrint("eventName: $eventName");if (eventName == kSystemTrayEventClick) {Platform.isWindows ? appWindow.show() : systemTray.popUpContextMenu();} else if (eventName == kSystemTrayEventRightClick) {Platform.isWindows ? systemTray.popUpContextMenu() : appWindow.show();}});
}
class MyApp extends StatelessWidget {const MyApp({super.key});// This widget is the root of your application.@overrideWidget build(BuildContext context) {return MaterialApp(title: 'Flutter Demo',theme: ThemeData(// This is the theme of your application.//// TRY THIS: Try running your application with "flutter run". You'll see// the application has a purple toolbar. Then, without quitting the app,// try changing the seedColor in the colorScheme below to Colors.green// and then invoke "hot reload" (save your changes or press the "hot// reload" button in a Flutter-supported IDE, or press "r" if you used// the command line to start the app).//// Notice that the counter didn't reset back to zero; the application// state is not lost during the reload. To reset the state, use hot// restart instead.//// This works for code too, not just values: Most code changes can be// tested with just a hot reload.colorScheme: ColorScheme.fromSeed(seedColor: Colors.deepPurple),),home: const MyHomePage(title: 'Flutter Demo Home Page'),);}
}class MyHomePage extends StatefulWidget {const MyHomePage({super.key, required this.title});// This widget is the home page of your application. It is stateful, meaning// that it has a State object (defined below) that contains fields that affect// how it looks.// This class is the configuration for the state. It holds the values (in this// case the title) provided by the parent (in this case the App widget) and// used by the build method of the State. Fields in a Widget subclass are// always marked "final".final String title;@overrideState<MyHomePage> createState() => _MyHomePageState();
}class _MyHomePageState extends State<MyHomePage> {int _counter = 0;void _incrementCounter() {setState(() {// This call to setState tells the Flutter framework that something has// changed in this State, which causes it to rerun the build method below// so that the display can reflect the updated values. If we changed// _counter without calling setState(), then the build method would not be// called again, and so nothing would appear to happen._counter++;});}@overrideWidget build(BuildContext context) {// This method is rerun every time setState is called, for instance as done// by the _incrementCounter method above.//// The Flutter framework has been optimized to make rerunning build methods// fast, so that you can just rebuild anything that needs updating rather// than having to individually change instances of widgets.return Scaffold(appBar: AppBar(// TRY THIS: Try changing the color here to a specific color (to// Colors.amber, perhaps?) and trigger a hot reload to see the AppBar// change color while the other colors stay the same.backgroundColor: Theme.of(context).colorScheme.inversePrimary,// Here we take the value from the MyHomePage object that was created by// the App.build method, and use it to set our appbar title.title: Text(widget.title),),body: Center(// Center is a layout widget. It takes a single child and positions it// in the middle of the parent.child: Column(// Column is also a layout widget. It takes a list of children and// arranges them vertically. By default, it sizes itself to fit its// children horizontally, and tries to be as tall as its parent.//// Column has various properties to control how it sizes itself and// how it positions its children. Here we use mainAxisAlignment to// center the children vertically; the main axis here is the vertical// axis because Columns are vertical (the cross axis would be// horizontal).//// TRY THIS: Invoke "debug painting" (choose the "Toggle Debug Paint"// action in the IDE, or press "p" in the console), to see the// wireframe for each widget.mainAxisAlignment: MainAxisAlignment.center,children: <Widget>[const Text('You have pushed the button this many times:'),Text('$_counter',style: Theme.of(context).textTheme.headlineMedium,),],),),floatingActionButton: FloatingActionButton(onPressed: _incrementCounter,tooltip: 'Increment',child: const Icon(Icons.add),), // This trailing comma makes auto-formatting nicer for build methods.);}
}