
文章目录
- 1. 准备硬件
- 2. 安装系统
- 3. 安装 VNC
- 4. 基础配置
- 4.1 路由转发
- 4.2 防火墙
- 4.3 selinux
- 4.4 安装包
- 4.5 重启
- 5. 配置代理
- 6. 安装 virtuabox
- 7. 安装 vagrant
- 8. 配置 kubespray
- 8.1 安装依赖工具
- 8.2 定制 Vagrantfile
- 8.3 配置代理与时间同步
- 8.4 配置私有镜像仓库
- 9. 安装虚拟机与 kubernetes
- 10. 卸载
1. 准备硬件
- 一台服务器:
- disk:1T + 256G
- cpu:36
- mem:128G
- 交换机:万兆
- 移动硬盘:30G+
- HDK显示器 :4k(为了方便当服务器放置机房可以远程电脑控制界面)

- 开启VT-D
- 开启VMX
- 开启SR-IOV


2. 安装系统
- 引导工具: https://www.ventoy.net/cn/
- u盘引导安装启动盘
- 下载 Rocky Linux 9.4
- 安装带界面的操作系统
- 系统分区:/、/boot、/boot/efi
- 创建用户:root/root、admin/admin
- 时区:shanghai
- 配置ip:192.168.21.95

配置ip:
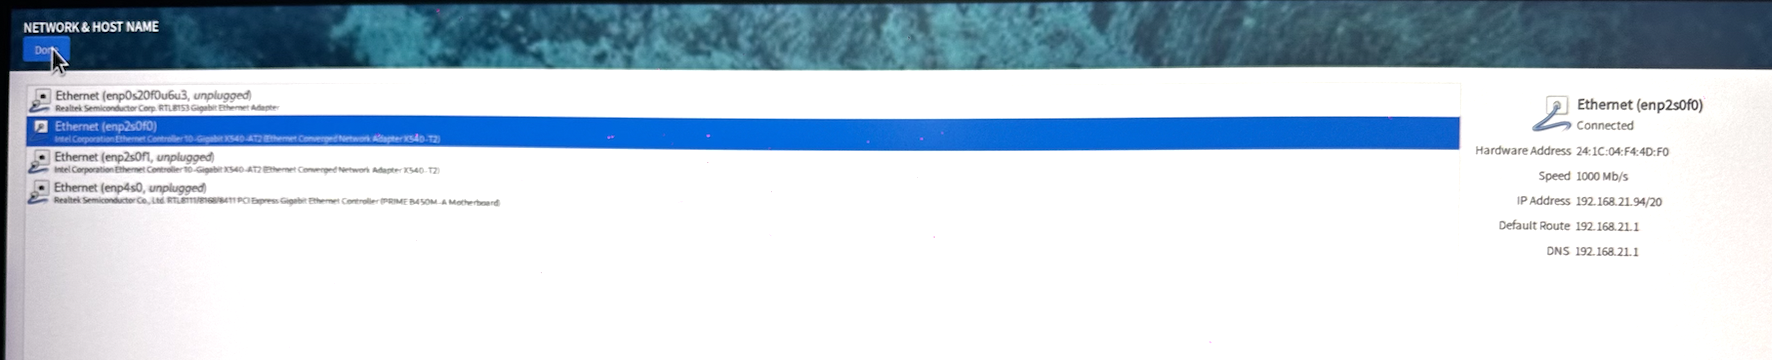
安装操作系统后,下一步安装VNC,为了方便远程。
配置地址ip
3. 安装 VNC
参考:在Rocky Linux 8上设置RealVNC服务器和客户端|AlmaLinux 8
下载:VNC-Server-6.11.0-Linux-x64.rpm
yum -y install VNC-Server-6.11.0-Linux-x64.rpm
VNC 安装完成后,停止服务器,拔掉占用空间的显示器,换成HDK 4k转换器。就可以将服务器放到机房,我们通过自己的电脑就可以桌面远程该服务器了。

打开vnc ,注册
$ cat vnc.lic
VND7Z-M22AB-MQD7R-GAAKF-2B4BA

测试通过客户端电脑远程该机器。
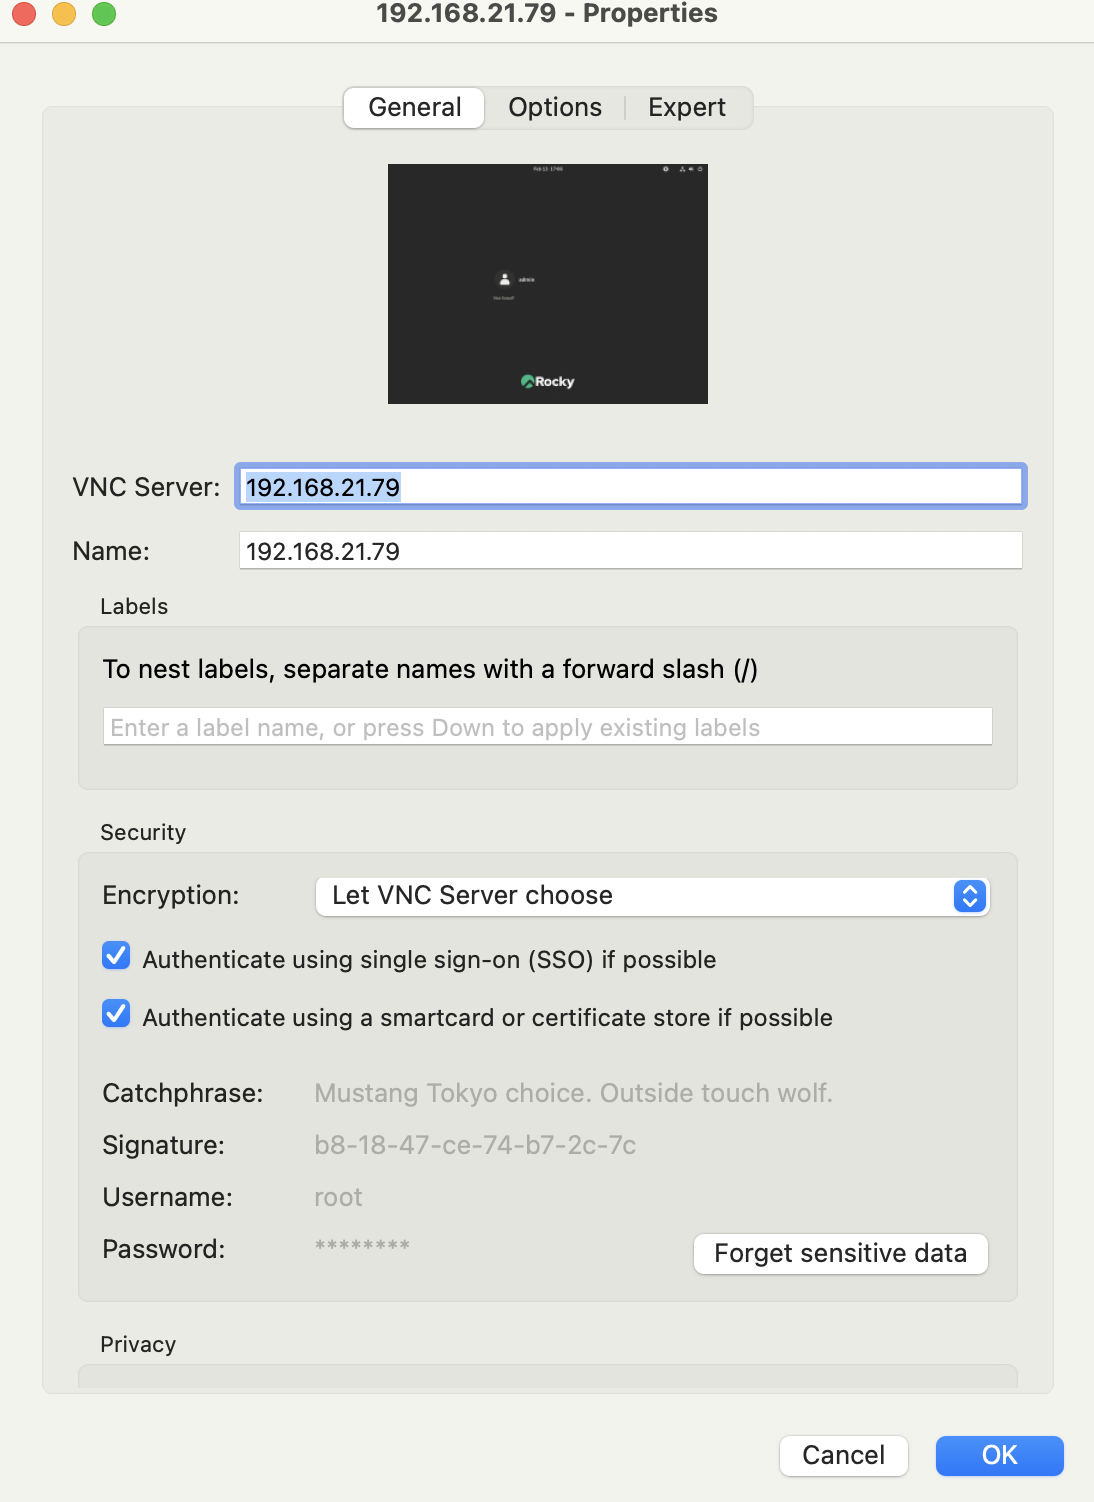
连接成功,代表vnc server 安装成功。
4. 基础配置
- 终端远程工具:https://termius.com/
- xshell
4.1 路由转发
$ modprobe br_netfilter
$ cat <<EOF>> /etc/sysctl.conf
net.ipv4.ip_forward = 1
net.bridge.bridge-nf-call-iptables=1
net.bridge.bridge-nf-call-ip6tables = 1
EOF
$ sysctl -p
4.2 防火墙
systemctl stop firewalld
systemctl disable firewalld
systemctl status firewalld
4.3 selinux
setenforce 0 && getenforce
sed -i 's/SELINUX=enforcing/SELINUX=disabled/g' /etc/selinux/config
4.4 安装包
$ dnf update
dnf -y install zsh git vim rsync net-tools epel-release wget python3.12 python3.12-pip
4.5 重启
reboot
5. 配置代理
注意:仅面向中国大陆客户需要配置代理,在配置代理时,请根据您的实际网络环境和业务需求进行调整,确保代理服务能够稳定、高效地工作。
- 配置代理
6. 安装 virtuabox
VirtualBox 是一款由 Oracle 开发和维护的开源虚拟化软件,支持在 Windows、macOS、Linux 等主流操作系统上运行多个虚拟机(VM)。它允许用户在同一台物理计算机上同时运行多个不同的操作系统,如 Windows、Linux、BSD 甚至 macOS,广泛应用于开发、测试和学习环境。
VirtualBox 具备完整的虚拟化功能,包括快照管理、虚拟网络配置、硬件加速(VT-x/AMD-V)、共享文件夹和远程桌面访问等。
安装 Virtuabox 请参考这篇文档:
- Rocky Linux 9.4 安装 VirtualBox 7.1
7. 安装 vagrant
Vagrant 是一个开源虚拟化管理工具,专为自动化和简化虚拟机环境的创建、配置和管理而设计。它通过 Vagrantfile 统一定义虚拟机的配置,支持 VirtualBox、VMware、KVM、Hyper-V 等多个虚拟化平台,并与 Ansible、Docker 及 Kubernetes 等工具无缝集成。
- 安装手册:https://developer.hashicorp.com/vagrant/downloads
sudo yum install -y yum-utils
sudo yum-config-manager --add-repo https://rpm.releases.hashicorp.com/RHEL/hashicorp.repo
sudo yum -y install vagrant
8. 配置 kubespray
Kubespray 是一个基于 Ansible 的 Kubernetes 集群自动化部署工具,支持在多种基础设施(如裸金属服务器、公有云、私有云等)上快速搭建高可用集群。它兼容 kubeadm,提供灵活的配置选项,支持多种网络插件(如 Calico、Flannel、Cilium),并具备负载均衡、持久化存储集成等功能。
Kubespray 通过 Ansible Playbook 实现无代理(Agentless)部署,简化了 Kubernetes 安装和管理,使用户能够以基础设施即代码(IaC)的方式定制集群配置。适用于需要自定义集群架构的大规模生产环境。
下载 kubespray
$ wget https://github.com/kubernetes-sigs/kubespray/archive/refs/tags/v2.26.0.tar.gz
$ tar zxvf v2.26.0.tar.gz
8.1 安装依赖工具
$ cd kubespray-2.26.0
$ dnf -y install  python3.12
$ curl https://bootstrap.pypa.io/get-pip.py -o get-pip.py
$ python3.12 get-pip.py
$ pip3.12 --version
pip 25.0.1 from /usr/local/lib/python3.12/site-packages/pip (python 3.12)
$ pip --version
pip 25.0.1 from /usr/local/lib/python3.12/site-packages/pip (python 3.12)
$ pip install -r requirements.txt
8.2 定制 Vagrantfile
使用 Vagrant 搭建一个 Kubernetes 开发测试环境,需要定义集群节点的 CPU、内存、磁盘、网络 等关键参数,并使用 VirtualBox 作为虚拟化后端。
$ cd kubespray-2.26.0
$ vim Vagrantfile
# -*- mode: ruby -*-
# # vi: set ft=ruby :# For help on using kubespray with vagrant, check out docs/vagrant.mdrequire 'fileutils'Vagrant.require_version ">= 2.0.0"CONFIG = File.join(File.dirname(__FILE__), ENV['KUBESPRAY_VAGRANT_CONFIG'] || 'vagrant/config.rb')SUPPORTED_OS = {"ubuntu2204"          => {box: "generic/ubuntu2204",         user: "vagrant"},"ubuntu2404"          => {box: "bento/ubuntu-24.04",         user: "vagrant"},"rockylinux8"         => {box: "bento/rockylinux-8",         user: "vagrant"},"rockylinux9"         => {box: "bento/rockylinux-9",         user: "vagrant"},"opensuse"            => {box: "opensuse/Leap-15.4.x86_64",  user: "vagrant"},"opensuse-tumbleweed" => {box: "opensuse/Tumbleweed.x86_64", user: "vagrant"},"oraclelinux8"        => {box: "generic/oracle8",            user: "vagrant"},"rhel8"               => {box: "generic/rhel8",              user: "vagrant"},
}if File.exist?(CONFIG)require CONFIG
end# Defaults for config options defined in CONFIG
$num_instances ||= 3
$instance_name_prefix ||= "k8s"
$vm_gui ||= false
$vm_memory ||= 16384
$vm_cpus ||= 8
$vm_network ||= "private_network"
$kube_master_vm_memory ||= 4096
$kube_master_vm_cpus ||= 4
$upm_control_plane_vm_memory ||= 32768
$upm_control_plane_vm_cpus ||= 8
$shared_folders ||= {}
$forwarded_ports ||= {}
$subnet ||= "172.18.8"
$subnet_split4 ||=100
$subnet_ipv6 ||= "fd3c:b398:0698:0756"
$netmask ||= "255.255.255.0"
$gateway ||= "172.18.8.1"
$dns_server ||= "8.8.8.8"
$bridge_nic ||= "en0" # 当是public_network时,这里填写网卡名称,如"en0"
$time_zone ||= "Asia/Shanghai"
$os ||= "rockylinux9"
$network_plugin ||= "calico"
# Setting multi_networking to true will install Multus: https://github.com/k8snetworkplumbingwg/multus-cni
$multi_networking ||= "False"
$download_run_once ||= "True"
$download_force_cache ||= "False"
$kube_version ||= "v1.29.7"
# The first three nodes are etcd servers
$etcd_instances ||= [$num_instances, 3].min
# The first two nodes are kube masters
$kube_master_instances ||= [$num_instances, 2].min
# All nodes are kube nodes
$kube_node_instances ||= $num_instances
# UPM controller nodes
$upm_ctl_instances ||= 1
# The following only works when using the libvirt provider
$kube_node_instances_with_disks ||= false
$kube_node_instances_with_disks_size ||= "20G"
$kube_node_instances_with_disks_number ||= 2
$kube_node_instances_with_disk_dir ||= ENV['HOME']
$kube_node_instances_with_disk_suffix ||= 'xxxxxxxx'
$local_path_provisioner_enabled ||= "False"
$local_path_provisioner_claim_root ||= "/opt/local-path-provisioner/"
$libvirt_nested ||= false
# boolean or string (e.g. "-vvv")
$ansible_verbosity ||= false
$ansible_tags ||= ENV['VAGRANT_ANSIBLE_TAGS'] || ""
$provider ||= ENV['VAGRANT_DEFAULT_PROVIDER'] || ""$vagrant_pwd ||= "root"
$vagrant_dir ||= File.join(File.dirname(__FILE__), ".vagrant")$playbook ||= "cluster.yml"
$extra_vars ||= {}node_instances_begin = [$etcd_instances, $kube_master_instances].max
host_vars = {}# throw error if os is not supported
if ! SUPPORTED_OS.key?($os)puts "Unsupported OS: #{$os}"puts "Supported OS are: #{SUPPORTED_OS.keys.join(', ')}"exit 1
end$box = SUPPORTED_OS[$os][:box]
# if $inventory is not set, try to use example
$inventory = "inventory/sample" if ! $inventory
$inventory = File.absolute_path($inventory, File.dirname(__FILE__))# if $inventory has a hosts.ini file use it, otherwise copy over
# vars etc to where vagrant expects dynamic inventory to be
if ! File.exist?(File.join(File.dirname($inventory), "hosts.ini"))$vagrant_ansible = File.join(File.absolute_path($vagrant_dir), "provisioners", "ansible")FileUtils.mkdir_p($vagrant_ansible) if ! File.exist?($vagrant_ansible)$vagrant_inventory = File.join($vagrant_ansible,"inventory")FileUtils.rm_f($vagrant_inventory)FileUtils.ln_s($inventory, $vagrant_inventory)
endif Vagrant.has_plugin?("vagrant-proxyconf")$no_proxy = ENV['NO_PROXY'] || ENV['no_proxy'] || "localhost,127.0.0.1,192.168.0.0/16,10.0.0.0/8,172.16.0.0/12,::1,.bsgchina.com"(1..$num_instances).each do |i|$no_proxy += ",#{$subnet}.#{i+$subnet_split4}"end
endVagrant.configure("2") do |config|config.vm.box = $boxif SUPPORTED_OS[$os].has_key? :box_urlconfig.vm.box_url = SUPPORTED_OS[$os][:box_url]endconfig.ssh.username = SUPPORTED_OS[$os][:user]# plugin conflictif Vagrant.has_plugin?("vagrant-vbguest") thenconfig.vbguest.auto_update = falseend# always use Vagrants insecure keyconfig.ssh.insert_key = false(1..$num_instances).each do |i|config.vm.define vm_name = "%s-%01d" % [$instance_name_prefix, i] do |node|node.vm.hostname = vm_nameif Vagrant.has_plugin?("vagrant-proxyconf")node.proxy.http     = ENV['HTTP_PROXY'] || ENV['http_proxy'] || ""node.proxy.https    = ENV['HTTPS_PROXY'] || ENV['https_proxy'] ||  ""node.proxy.no_proxy = $no_proxyendif i <= node_instances_beginmemory_size = "#{$kube_master_vm_memory}"cpu_num = "#{$kube_master_vm_cpus}"elsif i > node_instances_begin && i <= node_instances_begin + $upm_ctl_instancesmemory_size = "#{$upm_control_plane_vm_memory}"cpu_num = "#{$upm_control_plane_vm_cpus}"elsememory_size = "#{$vm_memory}"cpu_num = "#{$vm_cpus}"end["vmware_fusion", "vmware_workstation"].each do |vmware|node.vm.provider vmware do |v|v.vmx['memsize'] = memory_sizev.vmx['numvcpus'] = cpu_numendendnode.vm.provider "parallels" do |prl|prl.memory = memory_sizeprl.cpus = cpu_numprl.linked_clone = trueprl.update_guest_tools = falseprl.check_guest_tools = falseendnode.vm.provider :virtualbox do |vb|vb.memory = memory_sizevb.cpus = cpu_numvb.gui = $vm_guivb.linked_clone = truevb.customize ["modifyvm", :id, "--vram", "8"] # ubuntu defaults to 256 MB which is a waste of precious RAMvb.customize ["modifyvm", :id, "--audio", "none"]endnode.vm.provider :libvirt do |lv|lv.nested = $libvirt_nestedlv.cpu_mode = "host-model"lv.memory = memory_sizelv.cpus = cpu_numlv.default_prefix = 'kubespray'# Fix kernel panic on fedora 28if $os == "fedora"lv.cpu_mode = "host-passthrough"endendif $kube_node_instances_with_disks && i > node_instances_begin# install lvm2 packagenode.vm.provision "shell", inline: "sudo dnf install -y lvm2"# Libvirtdriverletters = ('a'..'z').to_adisk_dir = "#{$kube_node_instances_with_disk_dir}"node.vm.provider :libvirt do |lv|# always make /dev/sd{a/b/c} so that CI can ensure that# virtualbox and libvirt will have the same devices to use for OSDs(1..$kube_node_instances_with_disks_number).each do |d|disk_path = "#{disk_dir}/disk-#{i}-#{driverletters[d]}-#{$kube_node_instances_with_disk_suffix}.disk"lv.storage :file, :device => "hd#{driverletters[d]}", :path => disk_path, :size => $kube_node_instances_with_disks_size, :bus => "scsi"endendnode.vm.provider :virtualbox do |vb|# always make /dev/sd{a/b/c} so that CI can ensure that# virtualbox and libvirt will have the same devices to use for OSDs(1..$kube_node_instances_with_disks_number).each do |d|disk_path = "#{disk_dir}/disk-#{i}-#{driverletters[d]}-#{$kube_node_instances_with_disk_suffix}.disk"if !File.exist?(disk_path)vb.customize ['createhd', '--filename', disk_path, '--size', $kube_node_instances_with_disks_size] # 10GB diskendvb.customize ['storageattach', :id, '--storagectl', 'SATA Controller', '--port', d, '--device', 0, '--type', 'hdd', '--medium', disk_path, '--nonrotational', 'on', '--mtype', 'normal']endendnode.vm.provider :parallels do |prl|(1..$kube_node_instances_with_disks_number).each do |d|prl.customize ['set', :id, '--device-add', 'hdd', '--iface', 'nvme', '--size', $kube_node_instances_with_disks_size, '--type', 'expand']endendend$forwarded_ports.each do |guest, host|node.vm.network "forwarded_port", guest: guest, host: host, auto_correct: trueendif ["rhel8"].include? $os# Vagrant synced_folder rsync options cannot be used for RHEL boxes as Rsync package cannot# be installed until the host is registered with a valid Red Hat support subscriptionnode.vm.synced_folder ".", "/vagrant", disabled: false$shared_folders.each do |src, dst|node.vm.synced_folder src, dstendelsenode.vm.synced_folder ".", "/vagrant", disabled: false, type: "rsync", rsync__args: ['--verbose', '--archive', '--delete', '-z'] , rsync__exclude: ['.git','venv']$shared_folders.each do |src, dst|node.vm.synced_folder src, dst, type: "rsync", rsync__args: ['--verbose', '--archive', '--delete', '-z']endendip = "#{$subnet}.#{i+$subnet_split4}"if $vm_network == "public_network"node.vm.network :public_network,:ip => ip,:netmask => $netmask,:bridge => $bridge_nic,:libvirt__guest_ipv6 => 'yes',:libvirt__ipv6_address => "#{$subnet_ipv6}::#{i+100}",:libvirt__ipv6_prefix => "64",:libvirt__forward_mode => "none",:libvirt__dhcp_enabled => falseif ["rockylinux8","rockylinux9"].include? $os# Set default gatewaynode.vm.provision "shell", inline: <<-SHELLsudo nmcli connection modify "eth0" ipv4.gateway ""sudo nmcli connection modify "eth0" ipv4.never-default yessudo nmcli connection modify "System eth1" +ipv4.routes "0.0.0.0/0 #{$gateway}"sudo nmcli connection modify "System eth1" ipv4.gateway "#{$gateway}"sudo nmcli connection up "eth0"sudo nmcli connection up "System eth1"sudo echo -e "[main]\ndns=default\n\n[global-dns-domain-*]\nservers=#{$dns_server}" | sudo tee /etc/NetworkManager/conf.d/dns.confsudo systemctl restart NetworkManagerSHELLendelse $vm_network == "private_network"node.vm.network :private_network,:ip => ip,:netmask => $netmask,:libvirt__guest_ipv6 => 'yes',:libvirt__ipv6_address => "#{$subnet_ipv6}::#{i+100}",:libvirt__ipv6_prefix => "64",:libvirt__forward_mode => "none",:libvirt__dhcp_enabled => falseif ["rockylinux8","rockylinux9"].include? $os# Set default gatewaynode.vm.provision "shell", inline: <<-SHELLsudo nmcli connection modify "System eth1" ipv4.gateway "#{$gateway}"sudo nmcli connection up "System eth1"sudo echo -e "[main]\ndns=default\n\n[global-dns-domain-*]\nservers=#{$dns_server}" | sudo tee /etc/NetworkManager/conf.d/dns.confsudo systemctl restart NetworkManagerSHELLendend# if provider = virtualbox , set ethtool -K net device tx-checksum-ip-generic offif $provider == "virtualbox"if ["rockylinux8","rockylinux9"].include? $osnode.vm.provision "shell", inline: <<-SHELLsudo ethtool -K eth0 tx-checksum-ip-generic offsudo ethtool -K eth1 tx-checksum-ip-generic offsudo nmcli conn modify eth0 ethtool.feature-tx-checksum-ip-generic offsudo nmcli conn modify 'System eth1' ethtool.feature-tx-checksum-ip-generic offSHELLendend# Disable swap for each vmnode.vm.provision "shell", inline: "swapoff -a"# Set password for vagrant usernode.vm.provision "shell", inline: "echo 'vagrant:#{$vagrant_pwd}' | sudo chpasswd"# link kubectl to /usr/bin/kubectlnode.vm.provision "shell", inline: <<-SHELLsudo ln -s /usr/local/bin/kubectl /usr/bin/kubectlsudo ln -s /usr/local/bin/helm /usr/bin/helmsudo ln -s /usr/local/bin/nerdctl /usr/bin/nerdctlsudo ln -s /usr/local/bin/crictl /usr/bin/crictlSHELL# ubuntu2004 and ubuntu2204 have IPv6 explicitly disabled. This undoes that.if ["ubuntu2204"].include? $osnode.vm.provision "shell", inline: "rm -f /etc/modprobe.d/local.conf"node.vm.provision "shell", inline: "sed -i '/net.ipv6.conf.all.disable_ipv6/d' /etc/sysctl.d/99-sysctl.conf /etc/sysctl.conf"end# Rockylinux boxes needs UEFIif ["rockylinux8", "rockylinux9"].include? $osconfig.vm.provider "libvirt" do |domain|domain.loader = "/usr/share/OVMF/x64/OVMF_CODE.fd"endend# Disable firewalld on oraclelinux/redhat vmsif ["oraclelinux","oraclelinux8","rhel7","rhel8","rockylinux8","rockylinux9"].include? $osnode.vm.provision "shell", inline: "systemctl stop firewalld; systemctl disable firewalld"end# Set timezonenode.vm.provision "shell", inline: "timedatectl set-timezone #{$time_zone}"host_vars[vm_name] = {"ip": ip,"flannel_interface": "eth1","kube_network_plugin": $network_plugin,"kube_network_plugin_multus": $multi_networking,"download_run_once": $download_run_once,"download_localhost": "False","download_cache_dir": ENV['HOME'] + "/kubespray_cache",# Make kubespray cache even when download_run_once is false"download_force_cache": $download_force_cache,# Keeping the cache on the nodes can improve provisioning speed while debugging kubespray"download_keep_remote_cache": "False","docker_rpm_keepcache": "1",# These two settings will put kubectl and admin.config in $inventory/artifacts"kubeconfig_localhost": "True","kubectl_localhost": "True","local_path_provisioner_enabled": "#{$local_path_provisioner_enabled}","local_path_provisioner_claim_root": "#{$local_path_provisioner_claim_root}","helm_enabled": "True","ansible_ssh_user": SUPPORTED_OS[$os][:user],"ansible_ssh_private_key_file": File.join(Dir.home, ".vagrant.d", "insecure_private_key"),"unsafe_show_logs": "True","kube_version": "#{$kube_version}"}# Only execute the Ansible provisioner once, when all the machines are up and ready.# And limit the action to gathering facts, the full playbook is going to be ran by testcases_run.shif i == $num_instancesnode.vm.provision "ansible" do |ansible|ansible.playbook = $playbookansible.compatibility_mode = "2.0"ansible.verbose = $ansible_verbosity$ansible_inventory_path = File.join( $inventory, "hosts.ini")if File.exist?($ansible_inventory_path)ansible.inventory_path = $ansible_inventory_pathendansible.become = trueansible.limit = "all,localhost"ansible.host_key_checking = falseansible.raw_arguments = ["--forks=#{$num_instances}", "--flush-cache", "-e ansible_become_pass=vagrant"]ansible.host_vars = host_varsansible.extra_vars = $extra_varsif $ansible_tags != ""ansible.tags = [$ansible_tags]endansible.groups = {"etcd" => ["#{$instance_name_prefix}-[1:#{$etcd_instances}]"],"kube_control_plane" => ["#{$instance_name_prefix}-[1:#{$kube_master_instances}]"],"kube_node" => ["#{$instance_name_prefix}-[1:#{$kube_node_instances}]"],"k8s_cluster:children" => ["kube_control_plane", "kube_node"],}endendendend
end
$ mkdir vagrant
$ vim vagrant/config.rb
$instance_name_prefix = "94node-k8s"
$vm_cpus = 8
$vm_memory = 16384
$kube_node_instances_with_disks = true
$kube_node_instances_with_disks_size = 102400
$kube_node_instances_with_disks_number = 1
$kube_node_instances_with_disk_dir = "/home/admin/VirtualBox VMs/disks"
$override_disk_size = true
$disk_size = "80GB"
$num_instances = 6
$etcd_instances = 1
$kube_master_instances = 1
$os = "rockylinux9"
$subnet = "192.168.24"
$netmask = "255.255.240.0"
$bridge_nic = "enp2s0f0"
$network_plugin = "calico"
$multi_networking = "False"
$inventory = "inventory/94node"
$shared_folders = { 'temp/docker_rpms' => "/var/cache/yum/x86_64/7/docker-ce/packages" }
以下是各参数的详细说明:
- instance_name_prefix:设置集群实例的前缀,所有节点的名称将以 “94node-k8s” 开头。
- num_instances:定义集群总共 6 台 虚拟机(Kubernetes 节点)。
- etcd_instances:单独部署 1 台 etcd 实例,用于存储 Kubernetes 集群数据。
- kube_master_instances:配置 1 台 Master 节点,其余节点默认为 Worker 节点。
- vm_cpus:每个虚拟机分配 8 核 CPU。
- vm_memory:每个虚拟机分配 16GB 内存。
- kube_node_instances_with_disks:启用 附加数据盘,用于持久化存储(如 PV、日志等)。
- kube_node_instances_with_disks_size:附加磁盘大小 100GB(102400MB)。
- kube_node_instances_with_disks_number:每个节点附加 1 块磁盘。
- kube_node_instances_with_disk_dir:指定虚拟磁盘存储路径 /home/admin/VirtualBox VMs/disks。
- override_disk_size:是否覆盖默认磁盘大小(启用)。
- disk_size:根磁盘大小 80GB。
- os:指定操作系统为 Rocky Linux 9。
- subnet:Kubernetes 集群的 子网前缀,IP 规划范围为 192.168.24.0/20。
- netmask:子网掩码 255.255.240.0,支持 4096 个 IP 地址。
- bridge_nic:设置 桥接网络接口,指定宿主机上的物理网卡 enp2s0f0 作为桥接设备,使虚拟机能直接访问外部网络。
- network_plugin:选择 Calico 作为 Kubernetes CNI 网络插件,提供高效的 网络策略管理 和 BGP 路由支持。
- multi_networking:设置是否启用多网络(此处 禁用)。
- inventory:定义 Ansible 需要使用的 Kubernetes 目标清单文件。
- shared_folders:挂载本地目录 temp/docker_rpms 至虚拟机 /var/cache/yum/x86_64/7/docker-ce/packages,方便 离线安装 Docker 相关 RPM 包。
创建inventory清单目录:
$ cp -r inventory/sample inventory/94node
8.3 配置代理与时间同步
注意:仅面向中国大陆客户需要配置代理,在配置代理时,请根据您的实际网络环境和业务需求进行调整,确保代理服务能够稳定、高效地工作。
$ vim /home/admin/mg-95node/kubespray-2.26.0/inventory/95node/group_vars/all/all.yml
http_proxy: "http://192.168.21.101:7890"
https_proxy: "http://192.168.21.101:7890"## Refer to roles/kubespray-defaults/defaults/main/main.yml before modifying no_proxy
# no_proxy: ""
no_proxy: "localhost,127.0.0.1,192.168.0.0/16,10.0.0.0/8,172.16.0.0/12,::1,.bsgchina.com"## Some problems may occur when downloading files over https proxy due to ansible bug
## https://github.com/ansible/ansible/issues/32750. Set this variable to False to disable
## SSL validation of get_url module. Note that kubespray will still be performing checksum validation.
# download_validate_certs: False## If you need exclude all cluster nodes from proxy and other resources, add other resources here.
# additional_no_proxy: ""
additional_no_proxy: "localhost,127.0.0.1,192.168.0.0/16,10.0.0.0/8,172.16.0.0/12,::1,.bsgchina.com"ntp_enabled: true
ntp_manage_config: true
ntp_servers:- "cn.pool.ntp.org iburst"- "ntp1.aliyun.com iburst"- "ntp2.aliyun.com iburst"- "ntp3.aliyun.com iburst"- "ntp4.aliyun.com iburst"
8.4 配置私有镜像仓库
在开发测试环境中部署 Kubernetes 时,配置私有镜像仓库至关重要。私有仓库不仅能够提升镜像拉取速度,减少对外部网络的依赖,还可以提高镜像管理的安全性和可控性。
$ vim /home/admin/mg-95node/kubespray-2.26.0/inventory/95node/group_vars/all/containerd.yml
# Registries defined within containerd.
containerd_registries_mirrors:- prefix: quay.iomirrors:- host: http://harbor.bsgchina.comcapabilities: ["pull", "resolve"]skip_verify: true# containerd_max_container_log_line_size: -1containerd_registry_auth:- registry: harbor.bsgchina.comusername: adminpassword: Harbor12345
在 Kubespray 中,可以通过 containerd.yml 配置文件定义 containerd 镜像仓库镜像加速(Registry Mirrors) 及 私有仓库认证信息(Registry Authentication)。例如,配置 containerd_registries_mirrors 使 quay.io 的镜像请求重定向至 Harbor,从而优化拉取体验。同时,通过 containerd_registry_auth 配置 Harbor 认证信息,确保 Kubernetes 节点能够访问私有镜像。
9. 安装虚拟机与 kubernetes
从创建虚拟机到安装kubernetes完成。
$ vagrant up
输出:
vagrant up
Bringing machine '94node-k8s-1' up with 'virtualbox' provider...
Bringing machine '94node-k8s-2' up with 'virtualbox' provider...
Bringing machine '94node-k8s-3' up with 'virtualbox' provider...
Bringing machine '94node-k8s-4' up with 'virtualbox' provider...
Bringing machine '94node-k8s-5' up with 'virtualbox' provider...
Bringing machine '94node-k8s-6' up with 'virtualbox' provider...
==> 94node-k8s-1: Checking if box 'bento/rockylinux-9.4' version '202407.23.0' is up to date...
==> 94node-k8s-1: Clearing any previously set forwarded ports...
==> 94node-k8s-1: Clearing any previously set network interfaces...
==> 94node-k8s-1: Preparing network interfaces based on configuration...94node-k8s-1: Adapter 1: nat94node-k8s-1: Adapter 2: bridged
==> 94node-k8s-1: Forwarding ports...94node-k8s-1: 22 (guest) => 2222 (host) (adapter 1)
==> 94node-k8s-1: Running 'pre-boot' VM customizations...
==> 94node-k8s-1: Booting VM...
==> 94node-k8s-1: Waiting for machine to boot. This may take a few minutes...94node-k8s-1: SSH address: 127.0.0.1:222294node-k8s-1: SSH username: vagrant94node-k8s-1: SSH auth method: private key
==> 94node-k8s-1: Machine booted and ready!
==> 94node-k8s-1: Checking for guest additions in VM...
==> 94node-k8s-1: Setting hostname...
==> 94node-k8s-1: Configuring and enabling network interfaces...
==> 94node-k8s-1: Rsyncing folder: /home/admin/kubespray/ => /vagrant
==> 94node-k8s-1:   - Exclude: [".vagrant/", ".git", "venv"]
==> 94node-k8s-1: Rsyncing folder: /home/admin/kubespray/temp/docker_rpms/ => /var/cache/yum/x86_64/7/docker-ce/packages
==> 94node-k8s-1: Machine already provisioned. Run `vagrant provision` or use the `--provision`
==> 94node-k8s-1: flag to force provisioning. Provisioners marked to run always will still run.
==> 94node-k8s-2: Checking if box 'bento/rockylinux-9.4' version '202407.23.0' is up to date...
==> 94node-k8s-2: Clearing any previously set forwarded ports...
如果出现报错,修复完成后继续执行剩余任务,执行以下命令:
$ vagrant provision

提示:第一次安装过程中,vagrant up会执行创建虚拟机并进行基础配置,然后通过kubespray 安装部署 kubernetes,
后续执行vagrant up只会执行启动虚拟机。
安装完成后,远程至创建的虚拟机 master 节点,拷贝/etc/kubernetes/admin.conf至跳板机 /root/.kube/config。
$ vagrant ssh 94node-k8s-1
$ sudo -i
$ sudo cat /etc/kubernetes/admin.conf
跳板机安装 kubectl
$ curl -LO https://dl.k8s.io/release/$(curl -LS https://dl.k8s.io/release/stable.txt)/bin/linux/amd64/kubectl
$ mv kubectl /usr/local/bin/
$ chmod 755 /usr/local/bin/kubectl
virtualbox 虚拟机创建中,并自动进行基础配置。
$ kubectl get node
NAME    STATUS   ROLES           AGE   VERSION
k8s-1   Ready    control-plane   15m   v1.29.7
k8s-2   Ready    <none>          14m   v1.29.7
k8s-3   Ready    <none>          14m   v1.29.7
k8s-4   Ready    <none>          14m   v1.29.7
k8s-5   Ready    <none>          14m   v1.29.7
k8s-6   Ready    <none>          14m   v1.29.7
10. 卸载
删除虚拟机操作
$ vagrant destroyk8s-6: Are you sure you want to destroy the 'k8s-6' VM? [y/N] y
==> k8s-6: Forcing shutdown of VM...
==> k8s-6: Destroying VM and associated drives...k8s-5: Are you sure you want to destroy the 'k8s-5' VM? [y/N] y
==> k8s-5: Forcing shutdown of VM...
==> k8s-5: Destroying VM and associated drives...k8s-4: Are you sure you want to destroy the 'k8s-4' VM? [y/N] y
==> k8s-4: Forcing shutdown of VM...
==> k8s-4: Destroying VM and associated drives...k8s-3: Are you sure you want to destroy the 'k8s-3' VM? [y/N] y
==> k8s-3: Forcing shutdown of VM...
==> k8s-3: Destroying VM and associated drives...k8s-2: Are you sure you want to destroy the 'k8s-2' VM? [y/N] y
==> k8s-2: Forcing shutdown of VM...
==> k8s-2: Destroying VM and associated drives...k8s-1: Are you sure you want to destroy the 'k8s-1' VM? [y/N] y
==> k8s-1: Forcing shutdown of VM...
==> k8s-1: Destroying VM and associated drives...
参考:
- https://github.com/kubernetes-sigs/kubespray.git