服务器先下载python
:
一、Python环境搭建(CentOS/Ubuntu通用)
一条一条执行
安装基础依赖
# CentOS
sudo yum install gcc openssl-devel bzip2-devel libffi-devel zlib-devel
# Ubuntu
sudo apt update && sudo apt install build-essential libssl-dev libffi-dev zlib1g-dev下载并编译Python 3.7+
wget https://www.python.org/ftp/python/3.7.12/Python-3.7.12.tgz
tar xvf Python-3.7.12.tgz
cd Python-3.7.12
./configure --enable-optimizations
make -j 2 # 根据CPU核心数调整
sudo make altinstall # 保留系统默认Python验证安装
python3.7 -V # 应显示Python 3.7.12
需要配置的环境:
# 创建目录并设置权限
mkdir -p images
chmod 777 images #一定要确保images的777 因为它原理是esp32上传图片到images的文件夹#由用户访问5000端口时反回最后一张图片给他
# 安装依赖
pip install flask
# 运行服务(后台运行)
nohup python app.py > server.log 2>&1 &也可以直接 python3 cam_server.py一次性调用
使用步骤:
使用步骤:
-
服务器端:
bash
复制
# 创建目录并设置权限
mkdir -p images
chmod 777 images# 安装依赖
pip install flask# 运行服务(后台运行)
nohup python app.py > server.log 2>&1 &
-
Arduino端:
-
使用PlatformIO或Arduino IDE上传代码
-
打开串口监视器查看连接状态
-
手机访问:
复制
http://159.75.100.98:5000
关键修正点说明:
-
服务器端:
-
使用
send_from_directory函数前必须从flask导入 -
简化了图片接收逻辑,直接读取原始数据
-
添加时间戳防止浏览器缓存
-
设置严格的文件夹权限
-
Arduino端:
-
优化多部分格式的构建方式
-
确保分三次发送完整请求
-
增加更详细的错误提示
如果仍遇到问题,请按以下步骤排查:
-
检查服务器5000端口是否开放
-
查看服务器日志:
tail -f server.log -
在服务器测试图片上传:
bash
复制
curl -X POST http://localhost:5000/upload -F "image=@test.jpg"
-
检查images目录权限:
bash
复制
ls -ld images
arduino代码适配AI Thinker ESP32-CAM板子
#include <WiFi.h>
#include <HTTPClient.h>
#include "esp_camera.h"const char* ssid = "Redmi K70";
const char* password = "ss20051512";
const char* serverIP = "159.75.100.98";
const int serverPort = 5000;// 摄像头引脚配置(保持原样)
#define PWDN_GPIO_NUM     32
#define RESET_GPIO_NUM    -1
#define XCLK_GPIO_NUM      0
#define SIOD_GPIO_NUM     26
#define SIOC_GPIO_NUM     27
#define Y9_GPIO_NUM       35
#define Y8_GPIO_NUM       34
#define Y7_GPIO_NUM       39
#define Y6_GPIO_NUM       36
#define Y5_GPIO_NUM       21
#define Y4_GPIO_NUM       19
#define Y3_GPIO_NUM       18
#define Y2_GPIO_NUM        5
#define VSYNC_GPIO_NUM    25
#define HREF_GPIO_NUM     23
#define PCLK_GPIO_NUM     22void setup() {Serial.begin(115200);camera_config_t config;config.ledc_channel = LEDC_CHANNEL_0;config.ledc_timer = LEDC_TIMER_0;config.pin_d0 = Y2_GPIO_NUM;config.pin_d1 = Y3_GPIO_NUM;config.pin_d2 = Y4_GPIO_NUM;config.pin_d3 = Y5_GPIO_NUM;config.pin_d4 = Y6_GPIO_NUM;config.pin_d5 = Y7_GPIO_NUM;config.pin_d6 = Y8_GPIO_NUM;config.pin_d7 = Y9_GPIO_NUM;config.pin_xclk = XCLK_GPIO_NUM;config.pin_pclk = PCLK_GPIO_NUM;config.pin_vsync = VSYNC_GPIO_NUM;config.pin_href = HREF_GPIO_NUM;config.pin_sccb_sda = SIOD_GPIO_NUM;config.pin_sccb_scl = SIOC_GPIO_NUM;config.pin_pwdn = PWDN_GPIO_NUM;config.pin_reset = RESET_GPIO_NUM;config.xclk_freq_hz = 20000000;config.frame_size = FRAMESIZE_UXGA;config.pixel_format = PIXFORMAT_JPEG;  // for streaming//config.pixel_format = PIXFORMAT_RGB565; // for face detection/recognitionconfig.grab_mode = CAMERA_GRAB_WHEN_EMPTY;config.fb_location = CAMERA_FB_IN_PSRAM;config.jpeg_quality = 12;config.fb_count = 1;esp_err_t err = esp_camera_init(&config);if (err != ESP_OK) {Serial.printf("Camera init failed: 0x%x", err);return;}WiFi.begin(ssid, password);WiFi.begin(ssid, password);while (WiFi.status() != WL_CONNECTED) {delay(500);Serial.print(".");}Serial.println("\nWiFi Connected");
}void loop() {if (WiFi.status() == WL_CONNECTED) {camera_fb_t *fb = esp_camera_fb_get();if(!fb || fb->len == 0) {Serial.println("Capture Failed");return;}HTTPClient http;String url = "http://" + String(serverIP) + ":" + String(serverPort) + "/upload";http.begin(url);// 直接发送JPEG二进制数据http.addHeader("Content-Type", "image/jpeg");http.addHeader("Content-Length", String(fb->len));int httpCode = http.POST(fb->buf, fb->len);if(httpCode == HTTP_CODE_OK) {Serial.printf("Image Sent. Size: %dB\n", fb->len);} else {Serial.printf("Error Code: %d\n", httpCode);}http.end();esp_camera_fb_return(fb);}delay(3000); // 适当缩短延时
}
服务器代码:
from flask import Flask, request, render_template_string, send_from_directory
import os
import timeapp = Flask(__name__)
UPLOAD_FOLDER = './images'
os.makedirs(UPLOAD_FOLDER, exist_ok=True)# 强制设置权限
os.chmod(UPLOAD_FOLDER, 0o777)HTML_TEMPLATE = """
<!DOCTYPE html>
<html>
<head><title>实时监控</title><meta http-equiv="refresh" content="3"><style>img { max-width: 100%; height: auto; border: 2px solid #333; }</style>
</head>
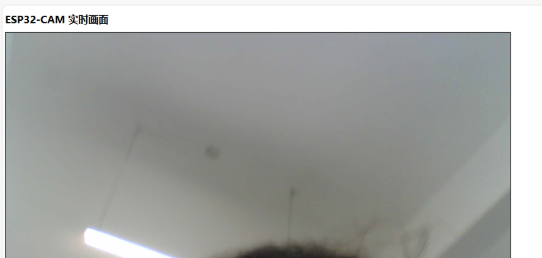
<body><h1>ESP32-CAM 实时画面</h1><img src="/latest.jpg?t={timestamp}">
</body>
</html>
"""@app.route('/')
def index():return render_template_string(HTML_TEMPLATE.replace("{timestamp}", str(time.time())))@app.route('/upload', methods=['POST'])
def upload():try:# 直接读取二进制数据raw_data = request.get_data()if len(raw_data) < 100:  # 简单验证数据有效性return "Invalid image data", 400timestamp = str(int(time.time()))filename = f"{timestamp}.jpg"filepath = os.path.join(UPLOAD_FOLDER, filename)with open(filepath, 'wb') as f:f.write(raw_data)# 更新符号链接latest_path = os.path.join(UPLOAD_FOLDER, 'latest.jpg')if os.path.lexists(latest_path):os.remove(latest_path)os.symlink(filename, latest_path)return f"Received {len(raw_data)} bytes", 200except Exception as e:return f"Server Error: {str(e)}", 500@app.route('/latest.jpg')
def serve_latest():try:return send_from_directory(UPLOAD_FOLDER, 'latest.jpg', mimetype='image/jpeg')except:return "Image not available", 404if __name__ == '__main__':app.run(host='0.0.0.0', port=5000, debug=False)